"The best bitcoin is the one you store yourself"
DESCRIPTION
This method can be described as storing a usb drive with the TrueCrypt pdf file that has been prepared in much the same way as the master usb in Method 5, in a bank safe deposit box which you have setup with your bank. Inside this usb drive will be the TrueCrypt pdf file with all your bitcoin information, the ‘IMPORTANT INSTRUCTIONS…’ document like the one in Method 5, and additional text which we call ‘Coded Data’, which will be added to the last page of the ‘IMPORTANT INSTRUCTIONS…’ document. The ‘coded data’ will basically be security questions and instructions which once answered and followed will reveal the password to open the ‘TrueCrypt pdf file’ stored on the usb.
If you use this method you can also split up your bitcoin addresses and store these in multiple usb’s in multiple bank deposit boxes, in order to reduce your potential loss if any single one security box’s contents are stolen or compromised. To reduce the negative impact of any one safety deposit box being compromised you can also store copies of the same prepared usb in two or more different safety deposit boxes. Method 6 (Variation 2) also allows you to do all this.
Method 6 (Variation 1) is the simpler but also less secure of the two Method 6 variations. The main advantage of using it as opposed to the variation 2 alternative is that it is simpler to setup, involves less work and is still fairly secure against most dangers other than government/bank seizure. Also, if you include in your coded data the final security question that was suggested in the ‘Choosing security questions’ article of the Security section:
What is the random 64 character password I included on my will to you?
... then your bitcoin information will be very hard to steal unlawfully. To get the password on your ‘Legal Will’, would require both knowledge of the solicitors office where your will is stored as well as permission to access it. These are very hard things for a thief to get. The solicitor’s office where your Legal Will is stored however will likely not prevent government seizure of your bitcoins.
Which leads us to the main disadvantage of Method 6 (Variation 1) which is vulnerability to government seizure. You could of course choose extra strong security questions to eliminate or reduce the chances of this happening however this will also increase the chances that your family members (or other correct person/s) will be unable to rightfully access your bitcoins in the event they forget the security answers. For this reason, we always recommend that you use Method 6 (Variation 2) over having extra difficult security questions.
GUIDELINES
HOW TO DO IT
NOTE TO READER
These pages give you the instructions to work out the passwords to the ‘TrueCrypt pdf files’ and ‘password protected pdf files’ on this usb drive. Do not reveal these passwords to anyone.
CODED DATA BELOW
INSTRUCTION 1: Answer the following questions.
1. What is the random 64 character password I included on my will to you?
2. What is the name of the street I lived in when I was 6 – 17 years old? (spell as ‘street’ not ‘st’)
3. What are the birthday’s of all 7 members of our immediate family from youngest to oldest in this format DDMMYYYY?
4. What is the first name of our first pet dog we ever had roughly starting around 2012? (official name not nickname)
5. What is the name of the primary school I studied at during grades 1-6? (first word only)
6. What is my full legal name as of 2017?
7. What is my city of birth as shown on my passport?
INSTRUCTION 2: Put the answers together in the right order. Replace all capital letters by their lowercase equivalent (we don’t want any capital letters). Remove all spaces between the words (we don’t want any spaces).
INSTRUCTION 3: Use the ‘QuickHash-Windows-v2.6.9.2’ program on this usb that came from https://quickhash-gui.org/download/quickhash-v2-6-9-2-for-windows/ and create a SHA512 hash of these characters. A SHA512 hash is a character string consisting of exactly 128 letters and numbers which is calculated by applying the SHA512 mathematical function to another character string. Only use the program on this usb to do this and not online SHA512 websites to do it. The reason is that online websites may record your answers or passwords. In Linux Mint 18.1: in main menu of ‘QuickHash-Windows-v2.6.9.2’, in the ‘Text’ tab under ‘Hash Algorithm’, select SHA512 > enter the characters into the ‘Text Hashing’ box > SHA512 hash result is displayed on the bottom of program
INSTRUCTION 4: When this is complete, record the SHA-512 hash of your character string on a computer text document. We will call this the SHA512 hash (1). This SHA512 hash (1) is the base password to open all secured files on this Usb.
INSTRUCTION 5: The SHA512 hash (1) base password will allow you to open the ‘password protected pdf file’ that is on this usb, inside the ‘TrueCrypt pdf file’. The ‘password protected pdf file’ contains the electrum seeds, and public and private addresses to all my Bitcoins.
To open the ‘TrueCrypt pdf file’ that contains the ‘password protected pdf file’ use ‘QuickHash-Windows-v2.6.9.2’ to create a SHA512 hash of the SHA512 (1) hash. We will call this second result the SHA512 (2) hash. The SHA512 (2) hash is the ‘TrueCrypt pdf file’ volume password.
>>> End of Doc <<<
Note: The above sample values highlighted in green were derived from the following answers to the security questions: Question 1: 2641152251515664112664345515363152263421343412266535622421311645 Question 2: Kayak Alley Question 3: 18042007020920041010200215051999040919971705197227111970 Question 4: Pluto Question 5: Theodore Question 6: Giovanna Carson Galvin Question 7: San Francisco
Step 1.2: Copy and paste the above ‘sample coded data’ onto a New Office Document (Microsoft word document, WPS writer document or any other document format that retains the correct formatting when copied onto). After this is done, save this file on Usb No. 8. You will be using this template to create your own ‘coded data’ document.
Step 2: Download needed programs and save to Usb X
Step 2.1 Download ‘QuickHash-Windows-v2.6.9.2’ from https://quickhash-gui.org/download/quickhash-v2-6-9-2-for-windows/ if you don’t already have a copy. Only download this specific version (Windows-v2.6.9.2) but if you can’t find it from this website, do an online search-engine search to download it from another site. If you download it from another site, check that the checksum of the file is correct (see our ‘Checksums’ page in our Security section for details). If you don’t want to use this particular program, then you can use a different SHA512 hashing software package but test it out first by comparing the results with those from other sources. Also, the result must contain capital and not lowercase letters. Copy and paste it onto Usb No. 8.
Step 2.2: Download the ‘TrueCrypt 7.1a’ installation package for Linux operating systems from https://www.grc.com/misc/truecrypt/truecrypt.htm if you haven’t already got a copy. Only download this specific version (version 7.1a) and if you can’t find it from this website, do an online search-engine search to download it from another site. If you download from another site, check that the checksum of the file is correct (see our ‘Checksums’ page in our Security section for details). The name of the file is truecrypt-7.1a-linux-x64.tar.gz (for 64 bit machines) or truecrypt-7.1a-linux-x86.tar.gz (for 32 bit machines). Copy and paste the downloaded file onto Usb No. 8.
Step 2.3: Download ‘Foxit Advanced PDF Editor 3.1.0.0’ from https://foxit-advanced-pdf-editor.en.softonic.com/ if you don’t already have a copy. Only use this specific version (version 3.1.0.0) and if you can’t find it from this website, do an online search-engine search and download it from another site. If you download it from another site, check that the checksum of the file is correct (see our ‘Checksums’ page in our Security section for details). Copy and paste the downloaded file onto Usb X.
Step 3: Boot up the Zorin OS Core usb operating system you used to create your Bitcoin addresses in the TrueCrypt pdf file.
Step 3.1: Boot up the Zorin OS Core usb operating system from Usb No. 7. This is the same operating system you used to create your Bitcoin addresses in the TrueCrypt pdf file. See Method 3: steps 3.1 to 3.4 if you don’t remember how to do this.
From this step onwards, an internet connection is not needed and you should remain disconnected from the internet for the entire time you are using the Zorin OS Core operating system.
Step 4: Create a ‘Public-Addresses-Only’ pdf document of your TrueCrypt pdf file, if you don’t already have one
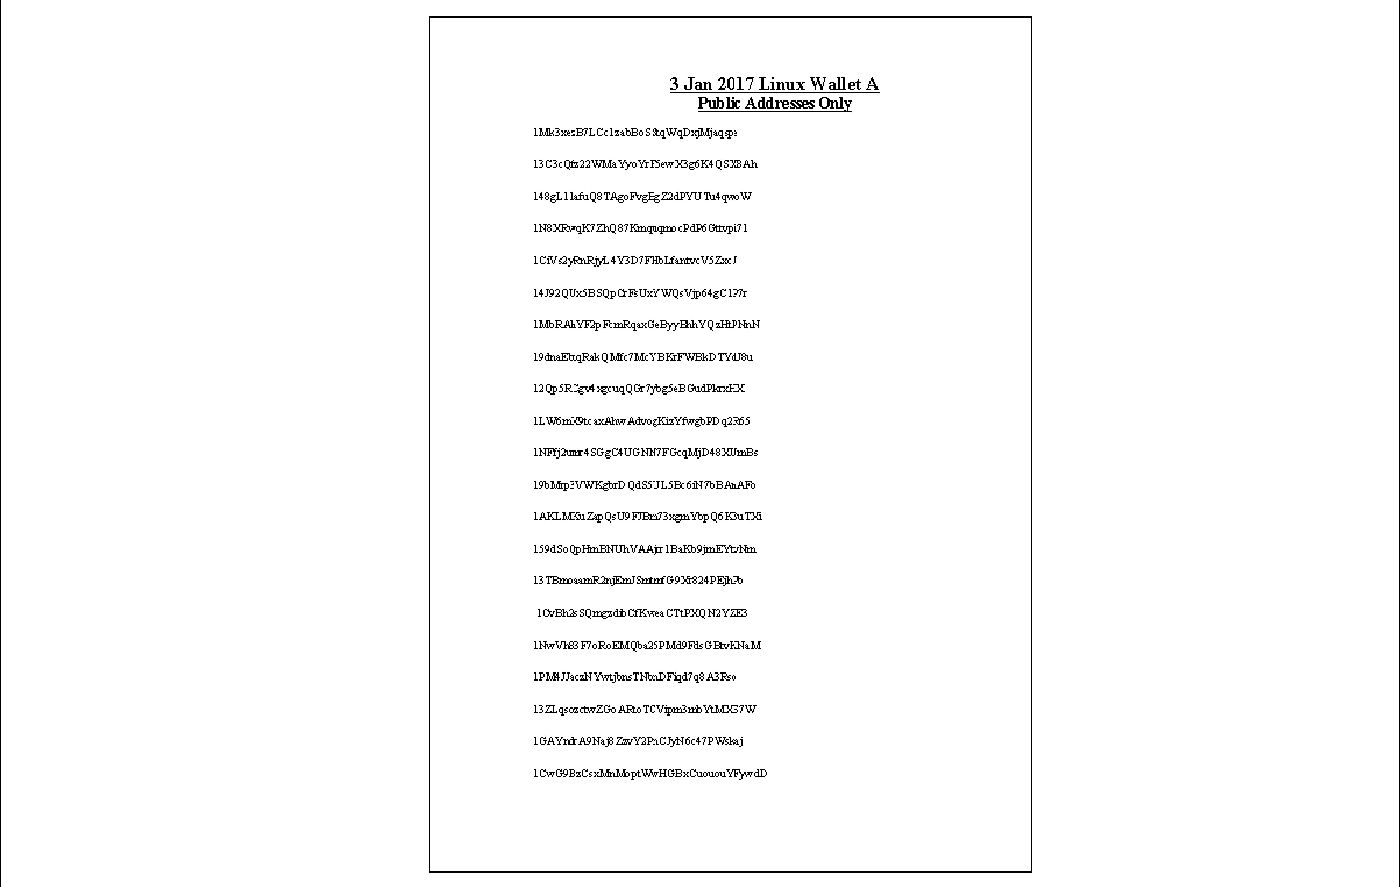
Step 4.1: Open the ‘LibreOffice Writer’ document where you will be saving the bitcoin public addresses. Create a heading for the document with the name of the wallet file it came from such as ‘3 Jan 2017 Linux Wallet A’ and the words ‘Public Addresses Only’ directly underneath it.
Step 4.2: Load up the Electrum portable program again from the usb and open the wallet file you want to extract the public addresses from. Zorin OS Core: Double click ‘electrum program’ > click ‘File’ > click ‘Open’ > search for ‘wallet file’ and click on it > press ‘Open’.
Step 4.3: Now click ‘Wallet’ in the electrum program, move your mouse down to ‘Private keys’, then press ‘Export’. Enter your password, then click ‘OK’.
Your wallets public and private keys (or addresses) will now be revealed.
Step 4.4: Keeping the default ‘Format’ settings of ‘CSV’, click ‘on ‘File’, then change the folder location to ‘Desktop’ at the very top of the options, then click ‘Save’. After this click ‘Export’ and then ‘OK’.
Step 4.5: Now search on your Desktop for the ‘electrum-private-keys.csv’ file you just created and double click on it to open with ‘LibreOffice Calc’.
Step 4.6: Click ‘OK’ on the first screen. Then highlight all the ‘Public addresses’ under where it says ‘address’, then copy and paste these onto a newly created ‘Text File’ (Zorin OS Core: right click anywhere on ‘Desktop’ > select ‘New Document’ > select ‘Text File’), then copy and paste it again from the ‘Text File’ onto your ‘LibreOffice Writer’ document.
When this is all done your document should look something like this:
Step 4.7: Save this LibreOffice document in Microsoft Word 97-2003 (.doc) format.
If you would like to create more than one set of public addresses; in the Electrum program repeat this process (steps 4.2 – 4.7) for all your electrum wallets. When you are finally finished…
Step 4.8: Select ‘File’ in the main menu on the top of LibreOffice Writer, then select ‘Export as PDF...’ and then press ‘Export’, then press ‘Save’. A new pdf file should now appear on your desktop. Close LibreOffice and all other unnecessary windows/folders. Then copy and paste the pdf document to the spare Usb (which is Usb No. 8 if you arrived here from Step 3 of this method).
NOTE: You can include the ‘Master Public Key’ in this Public-Addresses-Only pdf document if you like. Including it will make it easier for you to track all the bitcoin addresses in the wallet if more than the default number have been used. There is however a known weak point where if both a single ‘private key’ is known and the ‘master public key’ is known, the seed can be calculated. For this reason, if you choose to go ahead and include the ‘Master Public Key’ then add a warning like:
WARNING: ANYONE WHO KNOWS A SINGLE PRIVATE KEY OF ONE OF THESE PUBLIC ADDRESSES + THIS MASTER PUBLIC KEY, CAN WORK OUT YOUR SEED FOR THIS WALLET
Step 5: Prepare the ‘coded data’ electronic text document with the security questions (see ‘Choosing security questions’ article in the Security section for more information on how to choose security questions).
Step 5.1: Following the template from Method 6 (Variation 1): step 1, prepare your ‘Coded data’ sheet. The document template should be on Usb No. 8 when you saved it in Step 1.2. Load the document from Usb No. 8 using LibreOffice Writer.
Step 5.2: Replace all the text highlighted in green with your own questions and number values. When creating the questions, mix up the order of the questions.
Step 5.3: When complete, double check that all your values are correct by redoing it all from the beginning and pretending to be the person who will be viewing these files. Then save the document onto Usb No. 8.
Step 6: Add to ‘IMPORTANT INSTRUCTIONS FROM (your_name) – READ HERE’ document on Usb No. 8
You should have on Usb No. 8, an editable Microsoft word (or other format) document of the ‘IMPORTANT INSTRUCTIONS…’ text prepared in Method 5; but if you don’t you will need to create another one by following Method 5: step 4.1.
Step 6.1: Open this ‘IMPORTANT INSTRUCTIONS…’ Microsoft word (or other format) document in LibreOffice Writer and copy and paste the entire ‘coded data’ sheet with the security questions, you prepared in Method 6 (Variation 1): step 5, to the last page of the IMPORTANT INSTRUCTIONS…’ document.
Step 6.2: Now change the part in the ‘IMPORTANT INSTRUCTIONS…’ document where it says:
“TrueCrypt pdf file (version B): This TrueCrypt pdf file (version B) contains the ‘password protected pdf file’ that contains the information to access all my Bitcoins. In the password protected pdf file is all my electrum seeds, and bitcoin public and private addresses of all my bitcoins. Note that you should load the addresses from the Electrum seeds rather than the private addresses if you plan to use them, since there may be more addresses which haven’t been recorded on the pdf document which were generated and used afterwards by the software.
To open both these files use your 64 digit numbers-only password. If entering it directly for all the files doesn’t work then use ‘QuickHash-Windows-v2.6.9.2’ to create a SHA512 hash of these 64 numbers. Then create a SHA512 hash of this result. The second SHA512 hash result will be the TrueCrypt pdf file (version B) volume password. The first SHA512 hash result will be the password to the ‘password protected pdf file’ within the TrueCrypt pdf file (version B) volume.”
to…
“TrueCrypt pdf file (safe deposit box): This TrueCrypt pdf file (safe deposit box) contains the ‘password protected pdf file’ that contains the information to access all my Bitcoins. In the password protected pdf file is all my electrum seeds, and bitcoin public and private addresses of all my bitcoins. Note that you should load the addresses from the Electrum seeds rather than the private addresses if you plan to use them, since there may be more addresses which haven’t been recorded on the pdf document which were generated and used afterwards by the software.”
Step 6.3: Save the ‘IMPORTANT INSTRUCTIONS…’ document onto Usb No. 8 and then close LibreOffice Writer.
Your ‘IMPORTANT INSTRUCTIONS FROM (your_name) – READ HERE’ has been updated and is ready to be added to the Bank safety deposit box usb. Make sure the part of the file name above that says ‘(your_name)’ is actually your name (eg. David Bowen) and if it isn’t then rename it so it is.
Step 7: Calculate your passwords from the coded data sheet you prepared in Method 6 (Variation 1): step 5.
Step 7.1: Calculate your SHA512 hash (1) base password and SHA512 (2) password by carefully completing INSTRUCTION 1 to INSTRUCTION 5 on your coded data sheet prepared in step 5.
Step 7.2: Type these passwords down onto a new ‘Text File’ on Usb No. 8 and add some notes after them (such as ‘Master TrueCrypt password’ or ‘password protected pdf password’) so you know what each is. As an example, see the table below to see the passwords for the Sample coded data shown in Method 6 (Variation 1): step 1.1.
Passwords for sample coded data shown in Method 6 (Variation 1): step 1.1

Now that you know all the correct password codes, you are ready to change the passwords of the password protected files that are currently stored in Usb No. 8, and which will be put in the Master Usb in the Bank safety deposit box
Step 8: Install TrueCrypt 7.1a and then change the passwords
Step 8.1: Install TrueCrypt 7.1a onto the Zorin OS Core usb operating system. See Method 4: steps 3.1 – 3.8 if you don’t remember how to do this.
Step 8.2: Copy and paste the ‘TrueCrypt pdf file’ containing all your bitcoin information from Usb No. 8 or Usb X (whichever drive contains the program) onto the Zorin OS Core Linux desktop. Keep the copy that is still on Usb No. 8 or Usb X.
Step 8.3: Open the TrueCrypt program you installed in Step 7.1. Do this by pressing the ‘Z’ button on the bottom left of your desktop screen, then typing ‘truecrypt’ into the search menu, and then pressing the ‘TrueCrypt’ icon that appears.
Step 8.4: Change the password of the ‘TrueCrypt pdf file’ volume to the new password. Once the password is changed, that TrueCrypt file will become ‘TrueCrypt pdf file (safe deposit box)’.
Zorin OS Core 12: Click ‘Select File...’ > click on ‘Desktop’ on left side of TrueCrypt screen > click on ‘TrueCrypt PDF file’ > click ‘Open’ > click on any ‘Slot’ (1-64) on TrueCrypt main menu > click ‘Mount’ > enter ‘TrueCrypt pdf file’ password > click ‘OK’ > click ‘Volume Tools...’ on TrueCrypt main menu > click ‘Change Volume Password…’ > enter current ‘TrueCrypt pdf file’ password > enter new ‘TrueCrypt pdf file (safe deposit box) password in correct fields > click ‘OK’ > move mouse randomly in ‘TrueCrypt – Random Pool Enrichment’ screen for a while (‘TrueCrypt User Guide’ pdf recommends 30 seconds) > click ‘Continue’ > click ‘OK’ > wait a short while > click ‘OK’ once password change screen appears.
Step 8.5: Open the ‘password protected pdf file’ in ‘TrueCrypt pdf file (safe deposit box)’ using ‘Foxit Advance PDF Editor 3.1.0.0’ and change the password to the new password.
Part 1: Zorin OS Core 12: Open TrueCrypt pdf file mounted volume on the Zorin OS Core desktop by double clicking on it (it should already be mounted in TrueCrypt) > cut and paste ‘password protected pdf file’ in the TrueCrypt folder onto the Zorin OS Core desktop > Install and open Foxit Advanced PDF Editor 3.1.0.0 by following Method 3: steps 7.1 – 7.7 (Usb No. 2 is Usb No. 8) >.
Part 2: Zorin OS Core 12: In ‘Foxit Advanced PDF Editor 3.1.0.0’ main screen click ‘File’ > then click ‘Open...’ > then beside ‘Look in:’ search for the ‘Desktop’ > then search for the ‘password protected pdf file’ and click on it > then click ‘Open’ > enter old password > press ‘OK’ >. Now in ‘Foxit Advanced PDF Editor 3.1.0.0’ main menu click ‘Document’ > click ‘Security… > select ‘Security Level: Acrobat 7 Onwards (128-bit AES)’ > enter new ‘Open password’ > click ‘OK’ > re-enter new password > click ‘OK’ > click ‘File’ > click ‘Save’ > hit the [spacebar] on the keyboard where is asks for your name > click ‘OK’ > click ‘Add Watermark’ > then close ‘Foxit Advanced PDF Editor 3.1.0.0’.
Part 3: Zorin OS Core 12: Now cut and paste the newly changed ‘password protected pdf file’ on the Zorin OS Core desktop into the ‘TrueCrypt pdf file (safe deposit box)’ folder/volume > then close the ‘TrueCrypt pdf file (safe deposit box)’ folder/volume > ‘Dismount All’ in TrueCrypt main screen > then close TrueCrypt main screen.
Step 8.6: Double check that your new pdf and TrueCrypt files are working correctly and that the passwords have been changed accurately by running the programs again and entering all the passwords in from the start. Once you are satisfied everything is correct, dismount from the TrueCrypt program, and close all unnecessary windows.
Step 8.7: Rename the new ‘TrueCrypt pdf file’ on the Zorin OS Core desktop to ‘TrueCrypt pdf file (safe deposit box)’ then copy and paste ‘TrueCrypt pdf file (safe deposit box)’ onto Usb No. 8. Then delete the original ‘TrueCrypt pdf file’ on Usb No. 8 since we will no longer be needing it.
You have now changed the password of your original TrueCrypt pdf file to the TrueCrypt pdf file (safe deposit box) passwords and are currently storing it in Usb No. 8. It is now ready to be put into the Master usb and placed in the Bank safety deposit box
Now is your best chance to create smaller TrueCrypt pdf files if you haven’t already done so and if you want to retain secured and easier access to information in your bank safety deposit box Master usb drive in the future. See the italicized 7th and 8th points of Method 5 Guidelines for details. If you create these, make sure you delete any unsecured work-in-progress files you may have saved on Usb No. 8 before shutting down the Zorin OS Core operating system.
Step 9: Replace specific files currently in the Master Usb (if any is there) with new files.
Step 9.1: Insert the Master Usb that will be stored in the bank safety deposit box into one of your free usb ports on your laptop (or computer).
Step 9.2: The Master usb if pre-prepared correctly should have most if not all of the following files:
1. ‘IMPORTANT INSTRUCTIONS FROM (your_name) – READ HERE’ file (word and/or pdf version)
2. ‘Public-addresses-only’ non password protected pdf file
3. TrueCrypt pdf file (version A)’
4. ‘TrueCrypt pdf file (version B)’
5. ‘truecrypt-7.1a-linux-x86.tar.gz (for 32 bit machines)’ software program
6. ‘QuickHash-Windows-v2.6.9.2’ software program
7. ‘Electrum portable’ software program
Replace files 1, 2, 3 and 4 with the updated files. Do this by first deleting the old file on the Master usb and then copying and pasting the new file over from Usb. No. 8. You may need to copy and paste from Usb No. 8 to the Zorin OS Core desktop first if you can’t copy and paste directly to the Master usb. ‘TrueCrypt pdf file (version A)’ and ‘TrueCrypt pdf file (version B)’ should both be deleted and replaced with ‘TrueCrypt pdf file (safe deposit box)’.
Keep the software programs listed in points 5, 6 and 7. If any of these are missing then add them (see Method 5: step 2 for details).
Step 9.3: Remove the Master usb from the usb port and then shut down your computer currently running the Zorin OS Core usb operating system.
Step 10: Boot the Master Usb that will be stored in the bank safe deposit box using the Linux Mint 18.1 usb operating system installed on it, then replace old files with new files
Step 10.1: Boot up your Master usb Linux Mint 18.1 usb operating system. See Method 3: steps 3.1 -3.4 if you don’t remember how to do this
Step 10.2: The Master usb if pre-prepared correctly should have most if not all of the following files showing in the Linux Mint desktop screen:
1. ‘IMPORTANT INSTRUCTIONS FROM (your_name) – READ HERE’ (word and pdf version)
2. ‘Public-addresses-only’ non password protected pdf file
3. TrueCrypt pdf file (version A)’
4. ‘TrueCrypt pdf file (version B)’
5. ‘truecrypt-7.1a-linux-x86.tar.gz (for 32 bit machines)’ installed software program
6. ‘QuickHash-Windows-v2.6.9.2’ software program
7. ‘Electrum portable’ software program
Once again like in step 8.2 replace files 1, 2, 3 and 4 with the updated files. Do this by first deleting the old file on the Master usb and then copying and pasting the new file over from Usb. No. 8. ‘TrueCrypt pdf file (version A)’ and ‘TrueCrypt pdf file (version B)’ should both be deleted and replaced with ‘TrueCrypt pdf file (safe deposit box)’. The new ‘IMPORTANT INSTRUCTIONS…’ document should also be converted to a pdf version and stored on the Linux Mint 18.1 desktop (see Method 5: step 7.6 for details). You should keep both the pdf and non pdf version of the ‘IMPORTANT INSTRUCTIONS…’ document on the desktop.
Keep the software programs listed in points 5, 6 and 7. If any of these are missing then add or install them (see Method 5: step 2 and Method 4: steps 3.2 – 3.8 for details).
Step 10.3: Shut down your computer currently running the Master usb Linux Mint 18.1 usb operating system.
Step 11: Prepare the Master Usb for storage
Step 11.1: Take your completed ‘Master usb’ and completely wrap it in several layers of plastic (food) wrap. Then completely wrap it in several layers of aluminum foil. This material will completely shield the usb from Electromagnetic pulses (EMP) which may damage or render the usb useless.
Step 11.2: Now repeat step 11.1 to make it extra safe against EMP pulses.
Step 11.3: Place your foil/plastic wrapped master usb into the hard usb case.
Step 11.4: Label the usb case or the outside of the usb with something like:
“VERY IMPORTANT INFO INSIDE: PLEASE OPEN!”
You can do this by printing it out onto paper and then attaching it to the usb or usb hard case with sticky tape.
Step 12: Put the Master Usb in the bank safe deposit box
Step 12.1: Put your Master usb in the bank safety deposit box.
You should be aware that it is unknown how long your usb flash drive will accurately retain its data when not accessed in this way. No one can really know for sure as the technology was only invented sometime between the year 1995-2000. SanDisk quote 10 years data retention on their datasheets. We believe that this period is longer (in the vicinity of 100+ years) but recommend that you rewrite or replace the buried usb drive at least once every 10 – 15 years. SanDisk do however offer a product called ‘SanDisk Memory Vault’ that quotes a data retention period of 100 years, so you can use this as an additional backup to store also, if you prefer.
It is also recommended you create a duplicate Master Usb and store it in another bank safety deposit box in case something happens to your first one. In this case you will need to prepare more master usb’s each from the beginning of Method 5: step 2; you cannot simply copy and paste all the files onto another usb drive.
Congratulations, you have placed the Master Usb in the bank safety deposit box
Step 13: Delete all remaining ‘TrueCrypt pdf file’ copies from all storage mediums after ensuring you have a sufficient number of smaller TrueCrypt pdf files (see the italicized 7th and 8th points of Method 5 Guidelines for details), and then format all unnecessary usb drives
Step 13.1: Re-boot your computer into the Linux usb operating system on Usb No. 7 (see method 3: step 3 if you don’t remember how to do this). Then create a sufficient number of smaller TrueCrypt pdf files (version A) so you can access and use the bitcoins stored in them without having to dig up your buried Master usb. See the italicized 7th and 8th points of Method 5 Guidelines for details. If you like, you can choose to not create these smaller TrueCrypt pdf files (version A) and just keep the single TrueCrypt pdf file (version A) and store this instead.
Now transfer the TrueCrypt pdf file or files onto yet another usb drive that has been pre-formatted. You can use the Linux usb operating system to completely format the usb drive first if it hasn’t yet been pre-formatted (see method 6: variation 1: Step 13.3 for an example of how to do this). This usb drive will serve as the final resting place of the TrueCrypt pdf file/s. Alternatively, you can also transfer the file/s to an external hard drive as a second backup. Be very careful to ONLY transfer the TrueCrypt pdf file/s and be careful not to transfer them onto any of your main computer hard drive/s where your regular computer operating system is (Windows 7 in our case). Storing it on your main computer hard drive/s will make it more accessible to online hackers. If you accidently make a mistake and transfer any unsecured LibreOffice or other files then you need to restart this method from the beginning of Method 3: step 1.
If you don’t have an extra usb drive available, then you can temporarily store the file on ‘Usb X’ by inserting ‘Usb X’ into a free usb port and copying and pasting the files over from your desktop. Do note though that doing it this way will require more work later on. Basically, at the next immediate opportunity in Method 6: OPTIONAL STEP 13.4, once Usb No. 8 has been completely formatted in the Zorin OS usb operating system, you will need to load up your computer again in your regular operating system (Windows 7 in our case) and format Usb No. 8 using the ‘Eraser’ program before loading your computer in the Zorin OS operating system again and storing the password protected files in the final resting place of Usb No. 8 (Method 6: VARIATION 1: OPTIONAL STEP 13.4 gives exact instructions of how to do this).
Step 13.2: OPTIONAL STEP: Carefully transfer the electrum wallet file/s you created in Method 3: Step 5 onto your main operating system’s (Windows 7 in our case) electrum wallet folders (if you don’t still have a copy of these then you can create new one/s using the seeds from the TrueCrypt pdf file). It is possible to transfer the wallet files from within the Linux usb operating system by first mounting the drive containing the electrum wallet folders (usually drive C).
Zorin OS: Click ‘Z’ menu bar icon on bottom left hand side of desktop > select ‘Documents’ > scroll down to ‘+ Other Locations’ and click it > click on the drive containing the electrum wallet folders to mount the drive (usually drive C although the name of the drive will not be visible, only its size) > open the correct folder (usually C: \Users\ Name_of_your_computer\ AppData\ Roaming\ Electrum\ wallets) > copy and paste the wallet files into this folder.
Your main operating system’s (Windows 7 in our case) electrum wallet folders were created when and if you completed Method 2 (when we installed the electrum desktop program ‘electrum-2.7.18-setup.exe’ into the main operating system (Windows 7 in our case)). If you prefer instead to transfer the wallet files created in Method 3: Step 5 while using your regular computer operating system (in our case Windows 7), then see the instructions immediately before Method 2: Step 4 for details of how to do this. Bear in mind however that transferring the file using the main operating system (in our case Windows 7) has slightly more risk since the wallet files may be more exposed to malware on your regular operating system when the usb containing the files are initially inserted.
Step 13.3: Completely format Usb No. 8 within Zorin OS by doing the following:
Insert Usb No. 8 into a free usb port. In the Zorin OS operating system desktop, take notice of the name of the new drive that appears. In our example case it is ‘2.1 GB Volume’. Click the ‘Z’ menu bar icon on bottom left hand side of desktop. Then click ‘Documents’. Now scroll down to the part that shows the usb drive you just inserted. The name should match the name of the drive on your desktop. In our example case it is ‘2.1 GB Volume’. The drive should have the mark that looks like an upwards facing arrow immediately on the right hand side of it which shows that the drive has been mounted.
You will first be doing a quick format and then later a full format of all the data on this usb drive. For the quick format, right click this drive ‘2.1 GB Volume’, then click ‘Format’. In the screen that appears leave everything at the default setting:
Erase: Don’t overwrite existing data (Quick)
Type: Compatible with all systems and devices (FAT)
Then click ‘Format...’. On the next ‘Are you sure you want to format the volume?’ screen that appears, click ‘Format’.
Now for the full format, right click this drive ‘2.1 GB Volume’ again, and then click ‘Format’. In the screen that appears change the first part beside ‘Erase’ so you have the following settings:
Erase: Overwrite existing data with zeroes (Slow)
Type: Compatible with all systems and devices (FAT)
Then click ‘Format...’. On the next ‘Are you sure you want to format the volume?’ screen that appears, click ‘Format’.
Now wait up to 10 minutes for your computer to completely format the usb drive. While it is doing this, no indication that this is happening will show on your screen but rest assured your computer is formatting the drive. Once the drive has been completely formatted, the usb will reappear on your screen (not the desktop). On our screen it shows ‘2.1 GB Volume’ again. This is how you will know the format has been completed.
Step 13.4: OPTIONAL STEP: ONLY DO THIS STEP IF YOU HAVE TEMPORARILY STORED THE TRUECRYPT PDF FILE OR FILES ON USB X DURING STEP 13.1.
Switch off your computer. Then boot up your computer in your regular operating system (Windows 7 in our case). After this insert Usb No. 8 into a free usb port and do a quick format of Usb No. 8 (a quick format should be done and NOT a complete format). Windows 7: Right click usb drive > click ‘Format…’ > click ‘Start’ > click ‘OK’. After this, do a complete ‘Eraser’ format of Usb No. 8. This process can take a while so be patient. Windows 7: Right click usb drive > select ‘Eraser’ > click ‘Erase Unused Space’. Switch off your computer, Insert Usb No. 7 which still contains the Linux usb operating system (Zorin OS or Linux Mint) and boot up your computer in this Linux usb operating system. Now insert Usb X into a free usb port and copy and paste the password protected files onto your Linux usb operating system desktop. Finally insert Usb No. 8 again and copy and paste these same password protected files from the desktop onto the final resting place which is Usb No. 8. Double check that the files have been transferred properly.
Step 13.5: Switch off your computer. Insert Usb X which is the second newly created Linux usb operating system that was prepared in Method 3: Step 2.8, and boot up your computer in the Zorin OS Core or Linux Mint (Linux based) usb operating system using Usb X.
Step 13.6: Completely format Usb No. 7 within Zorin OS by doing the following:
Insert Usb No. 7 into a free usb port. In the Zorin OS operating system desktop, take notice of the name of the new drive that appears. In our example case it is ‘2.1 GB Volume’. Click the ‘Z’ menu bar icon on bottom left hand side of desktop. Then click ‘Documents’. Now scroll down to the part that shows the usb drive you just inserted. The name should match the name of the drive on your desktop. In our example case it is ‘2.1 GB Volume’. The drive should have the mark that looks like an upwards facing arrow immediately on the right hand side of it which shows that the drive has been mounted.
You will first be doing a quick format and then later a full format of all the data on this usb drive. For the quick format, right click this drive ‘2.1 GB Volume’, then click ‘Format’. In the screen that appears leave everything at the default setting:
Erase: Don’t overwrite existing data (Quick)
Type: Compatible with all systems and devices (FAT)
Then click ‘Format...’. On the next ‘Are you sure you want to format the volume?’ screen that appears, click ‘Format’.
Now for the full format, right click this drive ‘2.1 GB Volume’ again, and then click ‘Format’. In the screen that appears change the first part beside ‘Erase’ so you have the following settings:
Erase: Overwrite existing data with zeroes (Slow)
Type: Compatible with all systems and devices (FAT)
Then click ‘Format...’. On the next ‘Are you sure you want to format the volume?’ screen that appears, click ‘Format’.
Now wait up to 10 minutes for your computer to completely format the usb drive. While it is doing this, no indication that this is happening will show on your screen but rest assured your computer is formatting the drive. Once the drive has been completely formatted, the usb will reappear on your screen (not the desktop). On our screen it shows ‘2.1 GB Volume’ again. This is how you will know the format has been completed.
Step 13.7: Boot up your computer in your regular operating system (in our case Windows 7).
Step 13.8: Do a quick format of Usb No. 8 (a quick format should be done and NOT a complete format). Windows 7: Insert Usb No. 8 into free usb port > right click usb drive > click ‘Format…’ > click ‘Start’ > click ‘OK’. (SKIP THIS STEP IF YOU HAVE ALREADY DONE METHOD 6: VARIATION 1: OPTIONAL STEP 13.4).
Step 13.9: Do a complete ‘Eraser’ format of Usb No. 8. This process can take a while so be patient. Windows 7: Right click usb drive > select ‘Eraser’ > click ‘Erase Unused Space’. (SKIP THIS STEP IF YOU HAVE ALREADY DONE METHOD 6: VARIATION 1: OPTIONAL STEP 13.4).
Step 13.10: Do a quick format of Usb No. 7 (a quick format should be done and NOT a complete format). Windows 7: Insert Usb No. 7 into free usb port > right click usb drive > click ‘Format…’ > click ‘Start’ > click ‘OK’.
Step 13.11: Do a complete ‘Eraser’ format of Usb No. 7. This process can take a while so be patient. Windows 7: Right click usb drive > select ‘Eraser’ > click ‘Erase Unused Space’.
Step 13.12: Do a quick format of Usb X (a quick format should be done and NOT a complete format). Windows 7: Insert Usb X into free usb port > right click usb drive > click ‘Format…’ > click ‘Start’ > click ‘OK’.
Step 13.13: Now do a complete format of Usb X (a complete format should be done now and not a quick format). Windows 7: Right click usb drive > click ‘Format…’ > Uncheck ‘Quick Format’ > click ‘Start’ > click ‘OK’.
Step 13.14: Finally do a complete ‘Eraser’ format of Usb X. This process can take a while so be patient. Windows 7: Right click usb drive > select ‘Eraser’ > click ‘Erase Unused Space’.
Congratulations, you have completed Method 6 (Variation 1)
ADDITIONAL INFORMATION